
in reality, Arduino is a company that produces hardware boards with set different features boards such as UNO, LEONARDO, NANO, Due, Mega
at the present time, the company have full rang of hardware boards with a different set of features to utilize according to the project requirement
in sum, to use this hardware board, you need to download ide
But, what IDE does
in a word, it help’s you to write programs into hardware
in short, suppose an IDE as an interpreter which convert your high-level programming code into 1’s and 0’s that machine can understand(machine level language)
But what is sketch?
In Arduino programming, the word sketch is used instead of a word program to represent a program
For example: in an Arduino environment, the LED program is called as a LED sketch
Remember: to clarify, do not get confused with word sketch it just means a program
First: install IDE on your pc
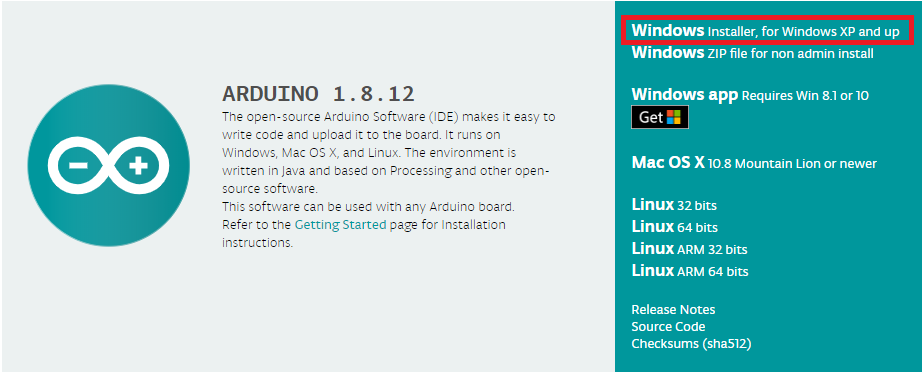
at this point, click here to download IDE on your p.c, at the time of writing this blog the latest Arduino software version available is 1.8.12
after that, download the latest version of IDE
when you download IDE, You need to select the operating system that you were using on your p.c, in my case I have a window
so, I selected the window installer
thereafter, select the installer according to your operating system( linux, Mac)
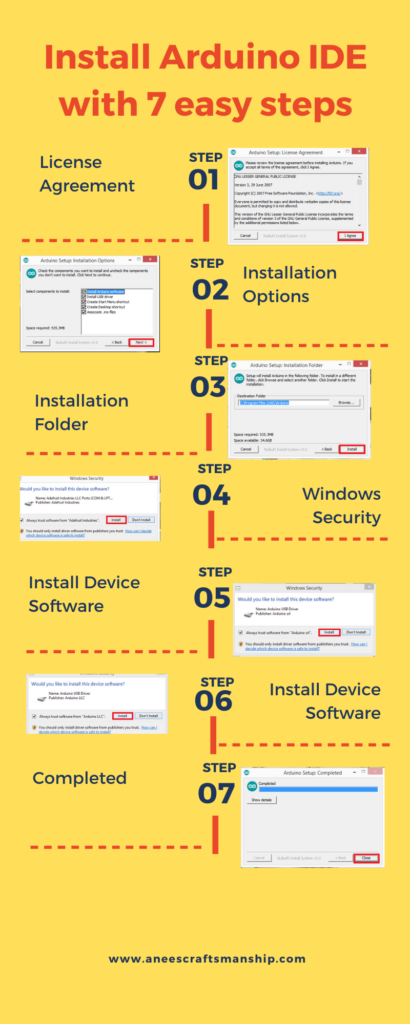
finally, open the downloaded IDE file and follow the 7 easy steps to install it
Second : Add the new board to the IDE
in the first place, open the desktop IDE
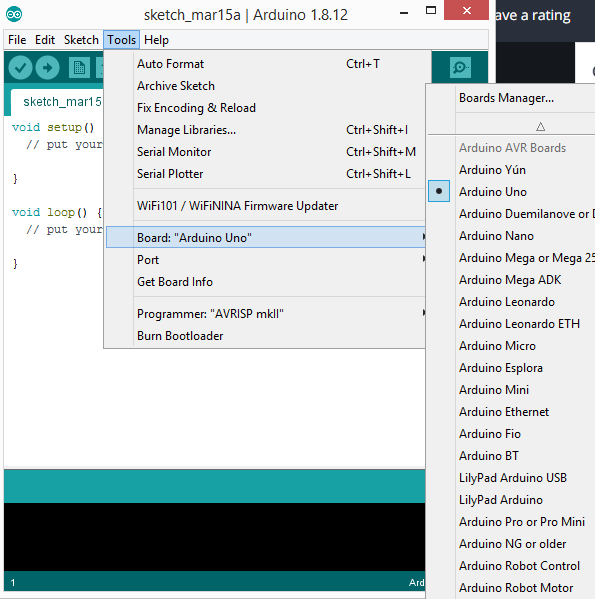
on this occasion, Select the board: to compile and upload new sketch on the board we need to select the board from a range of other boards that Arduino have
Tools—-> boards—-> Uno
If you have Uno board then by default the IDE have selected the board as Uno
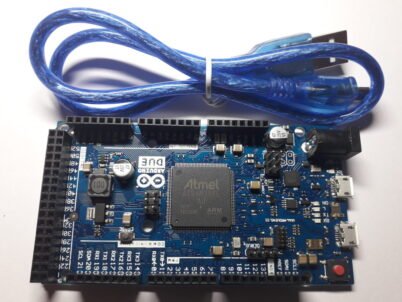
Arduino DUE: suppose if you have a DUE board with you then you won’t be able to find the DUE option on the IDE board selection list
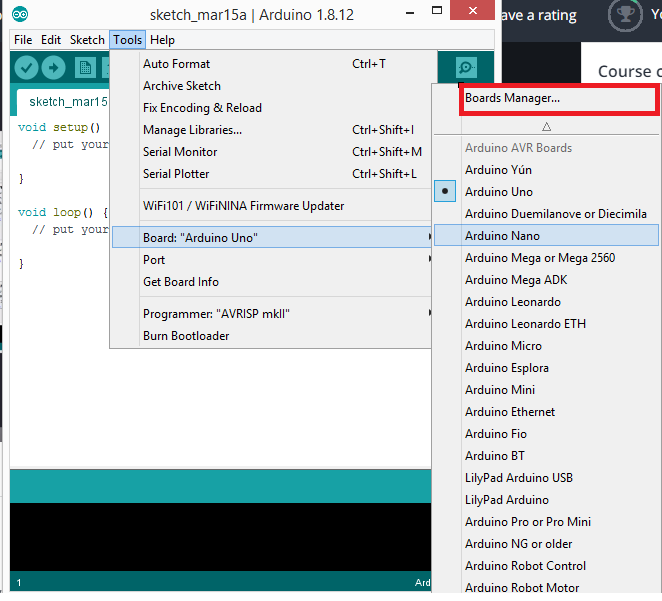
To view DUE option on the IDE
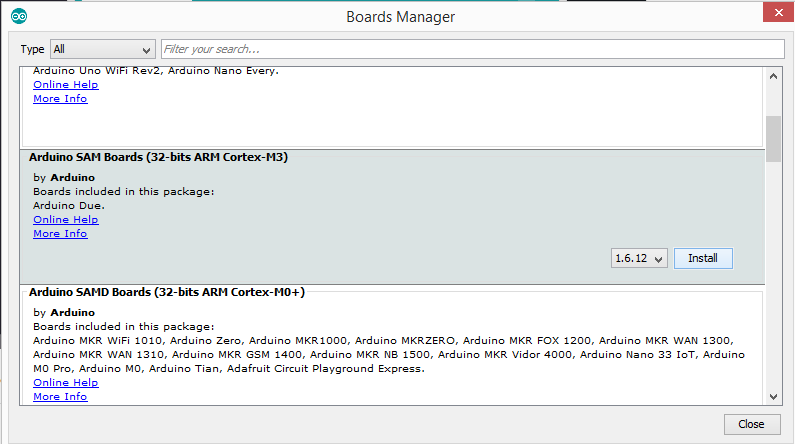
- Tools—-> boards—->boards manager
- select SAM Boards(32-ARM cortex-M3)—-> Install
Note: if you have UNO board then you no need to select Boards manager option
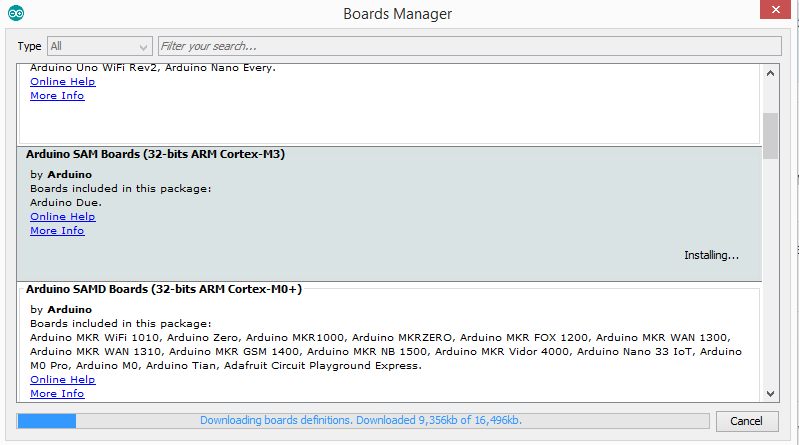
It will take several minutes to install after installation completed you can view the DUE option on the IDE on the bottom of board selection list

Tools—-> boards—-> Arduino Due (programming port)
Third : plug the Arduino board into a USB port of your p.c
as a matter of fact, as the board plugged into a USB port of your p.c, you will notice two LEDs lights (green and orange) were illuminated, it means that the board is receiving power from a USB port
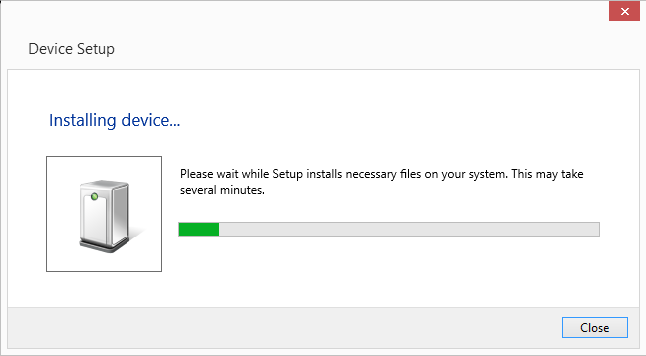
For the first time, when you plug in the board into a p.c
the window device drivers will automatically install required drivers for the board and it will take several minutes before it set up the board into p.c
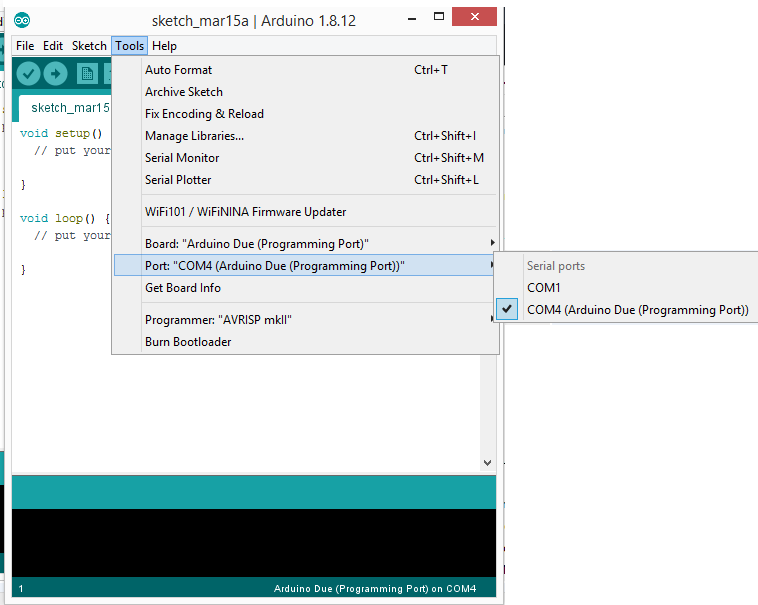
Fourth: set the port
at the present time, to view the port option that you have to use on IDE, you need to go on device manager in window operating system
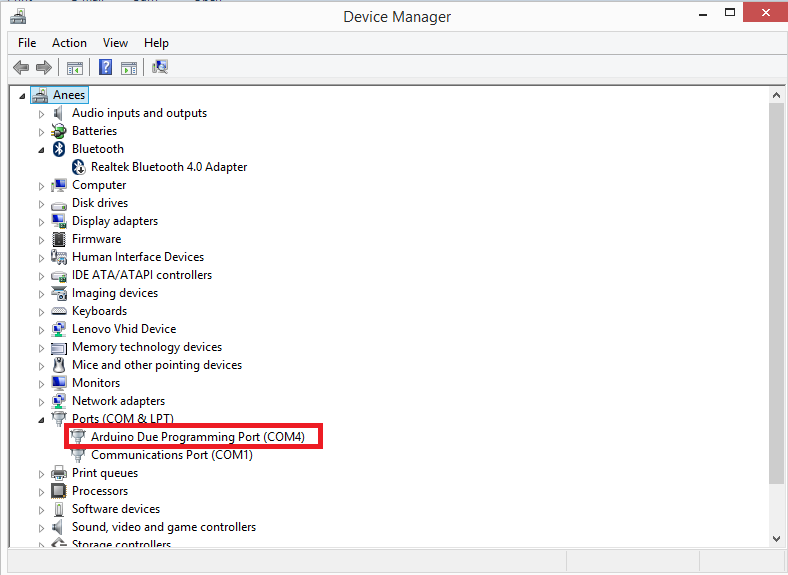
To set the port option on IDE
Tools—-> port—-> com4(Arduino Due (programming port))
Note: if you choosed the wrong port, then you get will an error called “no device found on com”
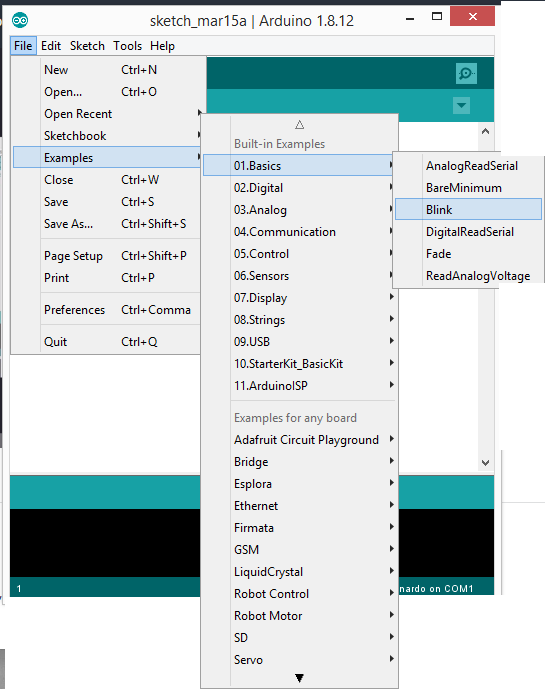
Fifth: test the set up is working
To test the setup we made, we need to run a simple sketch called blink, which is a default program in Arduino, when you compiled the Blink program you will notice that the orange LED will Blink
File—->Examples—->Basics—-> Blink
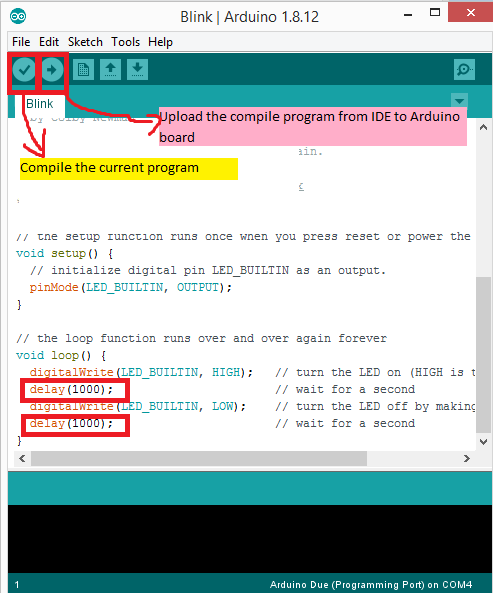
Test 2: reduce both the delay in the program to 100 and you notice that the LED will Blink faster
Test 3: increase both the delay in the program to 3000, and you will notice that the LED will Blink slower than the first test
Leave a Reply