

Hey there, let’s do signal processing on Arduino board, to know how to download and install Arduino ide click the below link
What is an Arduino? And how to install Arduino ide?
Usually, for audio processing and video processing or signal processing arduino boards are not enough because of their memory limitation
Plotting audio signal on Arduino
Note: to compile the below scripts Arduino due is used because Arduino will have more space if we compare it with Arduino Uno
If you use arduino Uno to compile the below scripts, it may not work because it will have less space
To plot an audio signal on Arduino, you need to convert the audio signal into C array, you can do that by following the link below.
Convert audio and image file to C array
You can get the audio data from the below link
Script for Plotting audio signal on Arduino
to plot audio data with arduino first, we will create a new tab to paste the audio data or waveform
add new tab—> name the file —–>ok
second, paste the below code in the main script

#define DATA_LENGTH 9066
extern  double audio_data[DATA_LENGTH];
void setup() {
Serial.begin(115200);
  int i=0;
  while(i<=DATA_LENGTH)
 {
  Serial.println(audio_data[i]);
  i=i+1;
  delay(5);
  }
}
void loop() {
}
plot the sine wave from below data link
plot the square wave from below data link
plot the triangular wave from the below data link
plot the sawtooth wave from the below data link
remember: to plot the different waveforms with arduino due, you need to change the data length of the script every time you use the different waveform and always the data length and waveform data should be the same in the script
You can also use a tool called Gnuplot to plot above waveforms
Use the below script to generate .dat file
#include <stdio.h>
#include <stdlib.h>
#include <math.h>
#define SIG_LENGTH 36874
extern const unsigned char wave_raw[36874];

int main()
{
     FILE *fptr;
    fptr = fopen("input_signal.dat","wt");
    for(int i=0;i<SIG_LENGTH;i++){
    fprintf(fptr,"\n%u",wave_raw[i]);
    }
    fclose(fptr);
    return 0;
}
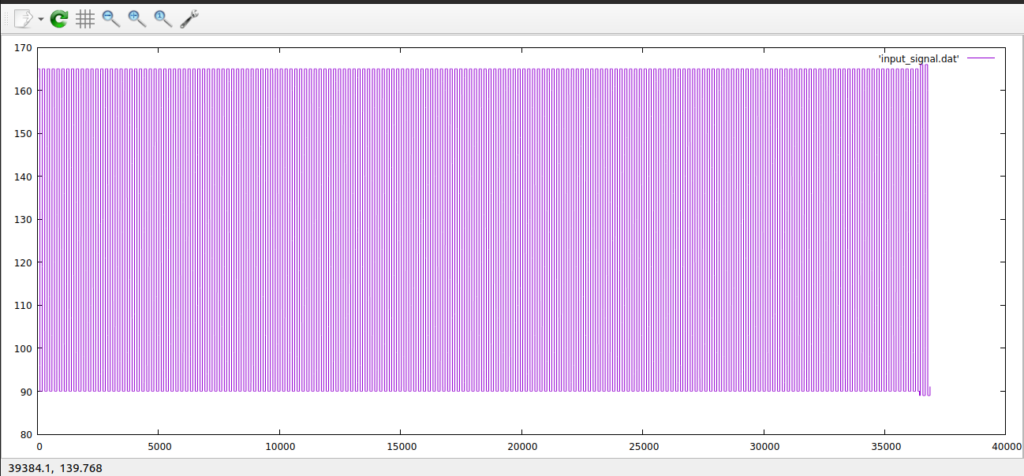
Plot the .dat file on Gnuplot
Find the mean of a signal
#define SIG_LENGTH 9126
//using extern keyword we are expoting our new tap waveform into our main script
extern double audio_data[SIG_LENGTH];
// prototype for our signal mean function
double signal_mean(double *sig_src_arr,uint32_t sig_length);
double MEAN;

void setup() {
  Serial.begin(115200);

MEAN  = signal_mean(&audio_data[0], SIG_LENGTH);
Serial.print("Mean : ");
Serial.println(MEAN);

}

void loop() {

}
// a simple function to calculate the mean of the signal or waveform and returns double

double signal_mean(double *sig_src_arr,uint32_t sig_length)
{
  double _mean =0.0;
  uint32_t i;
  for(i=0;i<sig_length;i++)
  {
  _mean  = _mean + sig_src_arr[i];
  }

  _mean = _mean /(double)sig_length;

 return _mean;
}
Output: To view, the signal mean of a waveform click on the serial monitor and set the baudrate as 115200
Leave a Reply