
to begin with, do you know? How to install themeforest wordpress theme on your dash-board, If not, then let me guide you in detail
to sum up, what you should do to install a new ThemeForest premium theme
Step 1: Download the zip file on your pc
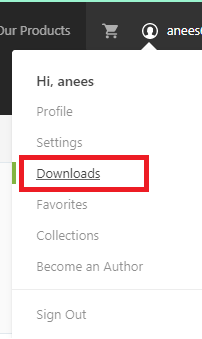
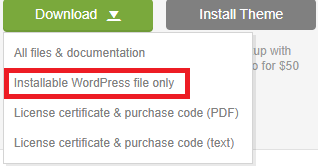
to clarify, the new theme file can be downloaded from ThemeForest website by click on the profile account logo to see downloads option and the download option contain four files
(i)All files and documentation
(ii)Installable WordPress file only
(iii)License certificate and purchase code(PDF)
(iv)License certificate and purchase code(text)
Before you start installing a purchased WordPress theme i suggest you, to first read the documentation PDF file of the theme
How to get a documentation PDF file of the ThemeForest Envato theme?
Download ((i)All files and documentation) and un zipped it, you will find the Documentation PDF file there
Which file i have to choose to upload the theme
“Installable WordPress file only” is required to install the theme
First technique: Default way
until now, the easy way to install a ThemeForest WordPress themes
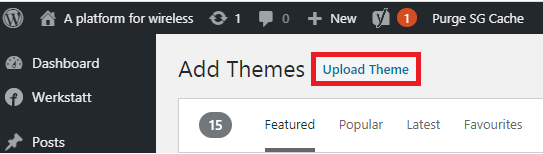
- go to the WordPress dashboard
- select Appearance —> themes—> Add new —>upload theme
- upload the zip file (installable wordpress file only)

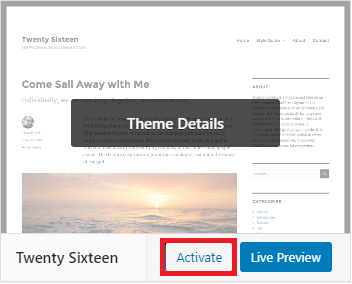
Once the purchased ThemeForest theme is uploaded on WordPress then you need to activate it
- Go to WordPress dashboard —>themes —> activate the ThemeForest Envato theme
If .zip file successfully uploaded on WordPress then, in that case, no need to proceed with further steps
As I have noted, when a theme file has a large size, due to that, the hosting provider doesn’t support the direct transfer of a large file
note!
While installing a ThemeForest theme, through WordPress dashboard some of you will not be able to install
But, Why?
Because some hosting provider set the Max_upload_limit to default 2 Mb however the theme which I am using requires 6 Mb
For example, consider the GoDaddy shared hosting 2 Mb max_upload_limit
in reality, the documentation PDF file of the theme which I use, recommended to set up max_upload_limit to 10mb for smoother installation of the theme
See some web hosting max_upload_ limit for installing a WordPress theme
How do I know the maximum upload size of the theme
in the first place, You need to see your theme documentation PDF file
How to solve this problem
You can change the limits by contacting your hosting provider or else you can also change from your hosting admin panel or use the second technique
Second technique: Use FileZilla software to upload file .zip theme file on the WordPress
in short, The main problem with the WordPress dashboard is that it does not accept large file
so, to transfer large files from the remote computer to the website we need a software called FileZilla

FileZilla software require four credentials
(i)Host
(ii) user name
(iii) password
(iv)port
this time, the four credentials can be obtained through the hosting service provider
Remember SFTP and FTP are two different protocols to access remote files of the site and login credentials of SFTP and FTP will be different from each other but you can use SFTP and FTP login credentials on single software called FileZilla and choose accordingly with which protocol you are comfortable
at this point, i will show you, how to connect remote server files by using SFTP and FTP with two different web hosting providers first Godaddy and Second SiteGround
Make sure you do the right setting in FilleZille and the setting for SFTP and FTP are different from each other
Get SFTP(secure file transfer protocol) login credentials
as a matter of fact, the SFTP login credential is required by the software called FileZilla to connect with the website to transfer files from the remote computer to website.
another key point, the SFTP login credential can be obtained through the hosting provider (Godaddy) or whichever hosting service provider you have for your website
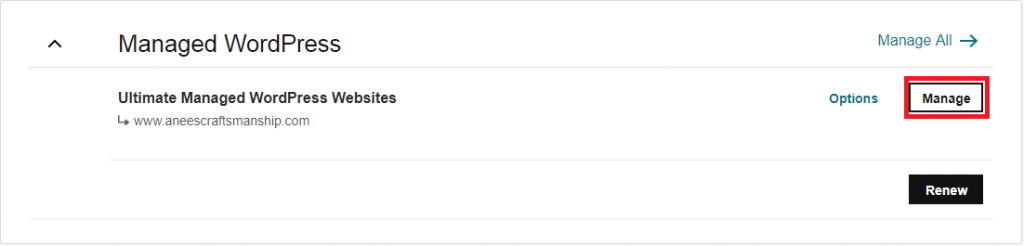
To obtain SFTP login credential for GoDaddy,
- you can login in the GoDaddy account and
- select my products then
- on the manage WordPress section
- click manage option then
- select the setting option to see SFTP section
- click on the view section to get login credentials

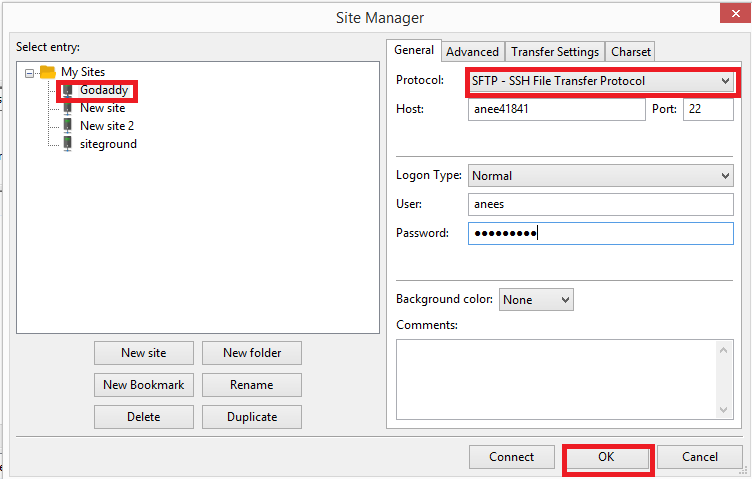
File Zilla settings for GoDaddy

- click file—> site manager —> new site
- set protocol as “SFTP-SSH File Transfer protocol—>ok
- Enter login credentials of GoDaddy (Host, username, password, port)—> quick connect
SiteGround FTP login credentials

- Login to SiteGround account
- Click on websites —>site tools—>FTP Accounts
- Create new FTP account by adding Account name and password —>create
- Write down your user name and password on a paper
- Go to manage FTP Accounts section and click three dots —> select FTP credentials

File Zilla setting for SiteGround FTP
- Click file —> site manager —> new site
- Enter login credentials of SiteGround (Host, username, password, port)
- Instead of Host, you can use server name also
- Set protocol as “FTP- File Transfer protocol
- Encryption: use explicit FTP over TLS if available

How to use FileZilla for transfer ThemeForest theme on the website
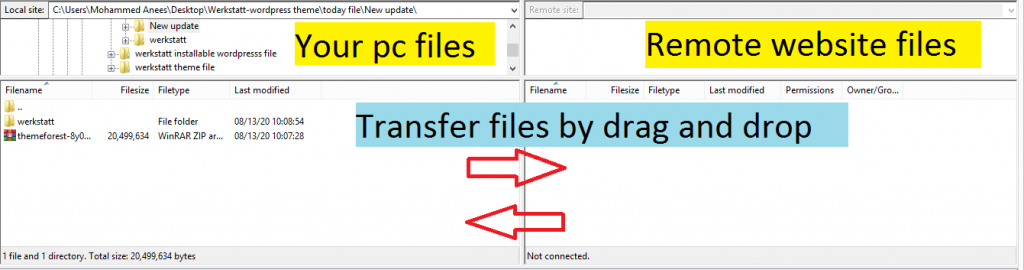
at the same time, the remote computer local file will be visible on the left side and the website files will be visible on the right side of the software GUI
For installing a ThemeForest theme into WordPress make sure unzipped the theme file before you transfer from a remote computer to the website on the server
on the right-hand side section of FileZilla click on wp-section to see the theme folder then click on that theme folder to see the list of theme files which is present on the website.
after all, to transfer file just you need to drag and drop the unzipped theme file from left-hand side of remote computer section to right-hand side website section, the transfer time will depend upon the file size and the internet speed
Once the theme is transferred from your pc to remote website successfully
- Go to wordpress dashboard —>Appearance—> themes —> Activate the theme which you have transferred
install the required plugins
Before the theme get fully activated, you need to install the required plugin’s for the theme

importing Demo content
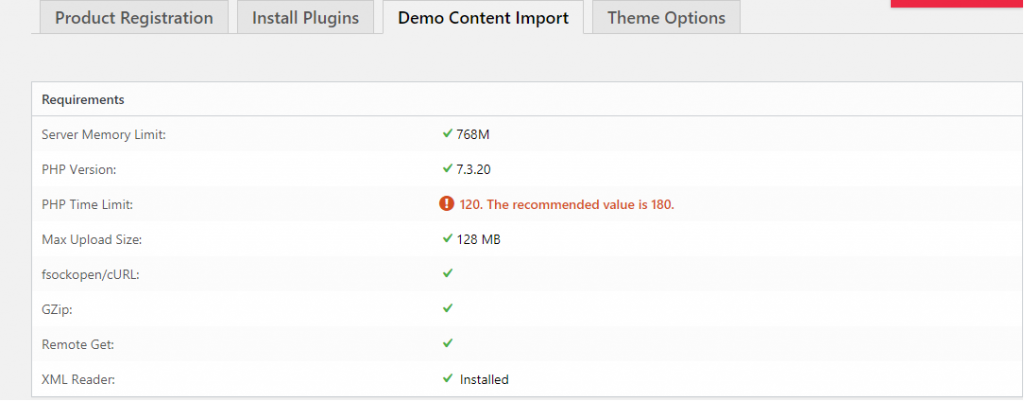
as i have noted, importing demo content highly depends upon the web hosting settings, if the limits were set low you won’t be able to access Demo content of the theme
particularly, check the PHP configuration limits of your theme
how to know the PHP configuration limits of your theme
basically, check the documentation file and read it thoroughly (All files and documentation)
at the present time, the theme which you are accessing now have PHP configuration limits
_max_execution_time 600
_memory_limit 128M
_post_max_size 32M
_upload_max_filesize 32M
so, why do we need to know the PHP configuration of the web hosting
because every theme have certain requirements that need to fullfiled other wise the theme will not function properly
Usually shared hosting provider have strick disciple to limits the usage so that, the other user’s on the same server won’t get downtime
obviously, you can ask your hosting provider to increase the limits suggested by your theme provider
generally, you can verify your PHP configuration’s limits by using a plugin called FastDev
furthermore, after installing the FastDev plugin, from WordPress Dashboard select FastDev to view all the limits that were set by your hosting provider
Get support for the purchased theme
at the present time, according to the Envato rule, you will get 6 months of support
basically, support related to installing a theme and small bug fixes and little modification with one or two lines of code
explicitly, they do not provide any support for third party plugin or WordPress administration related issues
Mobile-friendly test
So, you finished installing a theme
particularly, have you checked the mobile-friendlyness of your pages?
If not then do now from here —>
and
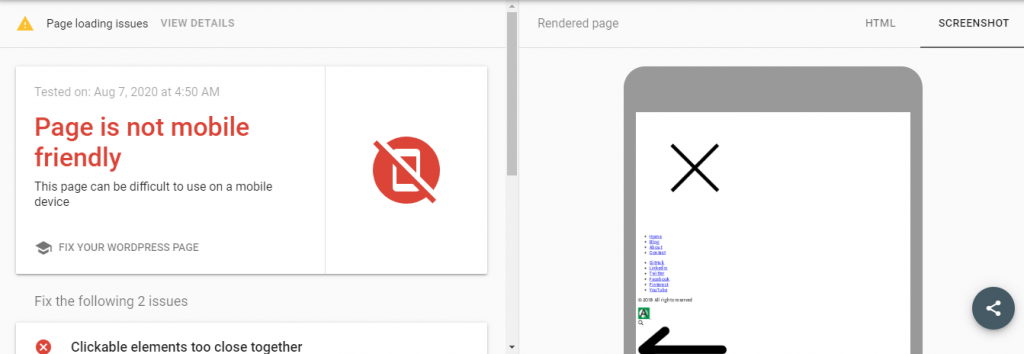
if you have done the test got result something like this and found page loading issues on your site that does not mean the theme is corrupted or bad
it might be a problem with your plugin
the major source of this kind of loading issues will be server-generated because you might have using a cheap shared web hosting
so, it’s better to shift high quality hosting like siteground, WPengine or Kinsta
the larger the loading issues you have on your site. next, the larger the negative effect on your Seo
How to update theme from ThemeForest?
Once you install the theme, you need to constantly update the theme to the latest version that is available
How do I know when to update the theme
You will see pop up in update section of your WordPress dashboard it is same as how you update your plugin to the latest version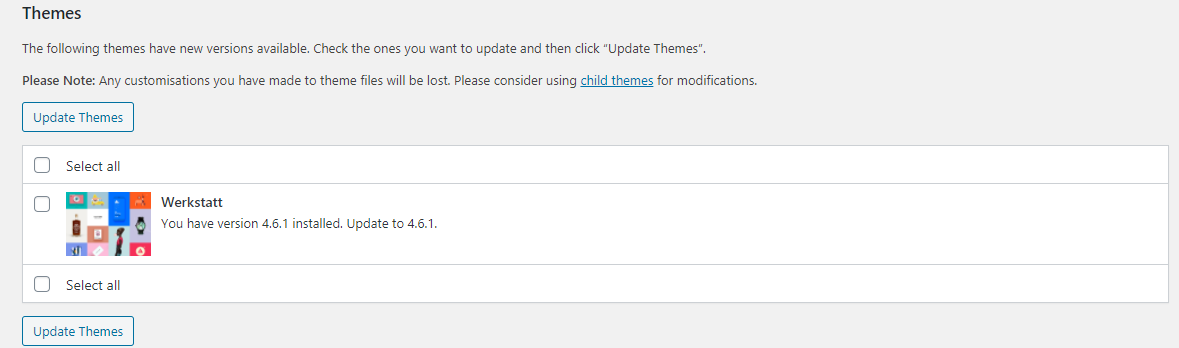
If you have any trouble updating theme through WordPress dashboard then you can use SFTP/FTP
(FileZilla) and follow the steps mention below to update a theme
Step 1: Download the latest version of the theme from ThemeForest
First, download the latest version of the theme from ThemeForest
and next make sure you have downloaded the file “installable WordPress file
only” then unzipped the downloaded file
Step 2: Transfer the unzip file from desktop to WordPress through FTP(FileZilla)
the process is same, how you installed the theme by SFTP/FTP, you just need to drag and drop the unzipped file from desktop section to WordPress section.
are you worried that you will lose your old customization which you have done on the theme but wait! by updating a new version of theme won’t remove your older version customization
So, you just need to drag and drop an unzipped file from
desktop section to the WordPress section and make sure you drop in the folder
called themes and overwrite the existing theme file
- Wp-content—–> themes—–> overwrite the existing theme file.
Check out some recent blog post
- Free SSL certificate and CDN to keep WordPress secure
- The Annoying WordPress error: the response is not a valid JSON response
Leave a Reply