
Data types in Arduino
| Data type name | size in bits/bytes | from size | to size |
|---|---|---|---|
| bool | 8bit(1byte) | true=1 | false=0 |
| byte | 8bit(1byte) | 0 | 255 |
| char | 8bit(1byte) | -128 | 127 |
| word | 16bit(2byte) | 0 | 65535 |
| int | 16bit(2byte) | -32768 | 32767 |
| unsigned long | 32bit(4byte) | 0 | -4,294,967,295 |
| long | 32bit(4byte) | -2,147,483,648 | 2,147,483,647 |
| float | 32bit(4byte) | -3.4028235E+38 | 3.4028235E+38 |
| double | 4byte for uno and 8 byte for due |
Serial.print and serial.println
Serial.print is a function that simply print but serial.println will cut down the continuity and print the statement in the next line
void setup() {
  // put your setup code here, to run once:

  Serial.begin(115200);

  {
  Serial.print("hi! there people welcome to the blog---1");
  Serial.println(" hi! there people  welcome to the blog--2");
  Serial.print("hi! there people  welcome to the blog--3 ");
  }
}

void loop() {

}
output
hi! there people welcome to the blog---1 hi! there people  welcome to the blog--2
hi! there people  welcome to the blog--3
Iterate an array
int arr[10]={2,7,8,9,2,6,8,9,0};
int i;
void setup() {
  // put your setup code here, to run once:

  Serial.begin(115200);
  for(i=0; i<9; i++)
  {
  Serial.println(arr[i]);
  }
}

void loop() {

}
output
2 7 8 9 2 6 8 9 indexOf()
description
locate the position of a character or string inside another string
void setup() {
  Serial.begin(115200);

  String variable_string = "22,85,254, 458,888,999,48,first,second";
  int index = variable_string.indexOf("85");
  Serial.println(index);
}

void loop() {
}
output
3length()
Description
returns the length of the string
void setup() {
  Serial.begin(115200);

  String string = "22,85,254,458,888,999,48,first,second";
  int Length = string.length();
  Serial.println(Length);
}

void loop() {
}
output
37delay()
Description
delay() function pauses the programs for a specified amount of milliseconds(ms) and 1000 milliseconds is a 1 second
Syntax:
delay(ms)
millis()
Description
Returns the number of milliseconds passed since the board run the millis() program
Parameters
none
Example
unsigned long  Time ;

void setup() {
  Serial.begin(115200);
}
void loop() {
  Serial.print("Time: ");
  Time = millis();
  Serial.println(Time); // Prints the milliseconds since program started
  delay(1000);          // wait a second So that, not to send a large amount of data at a time
}
Output
Time:2
Time:1002
Time:2002
Time:3002
Time:4002
Time:5002
Time:6002
Multitasking in an Arduino
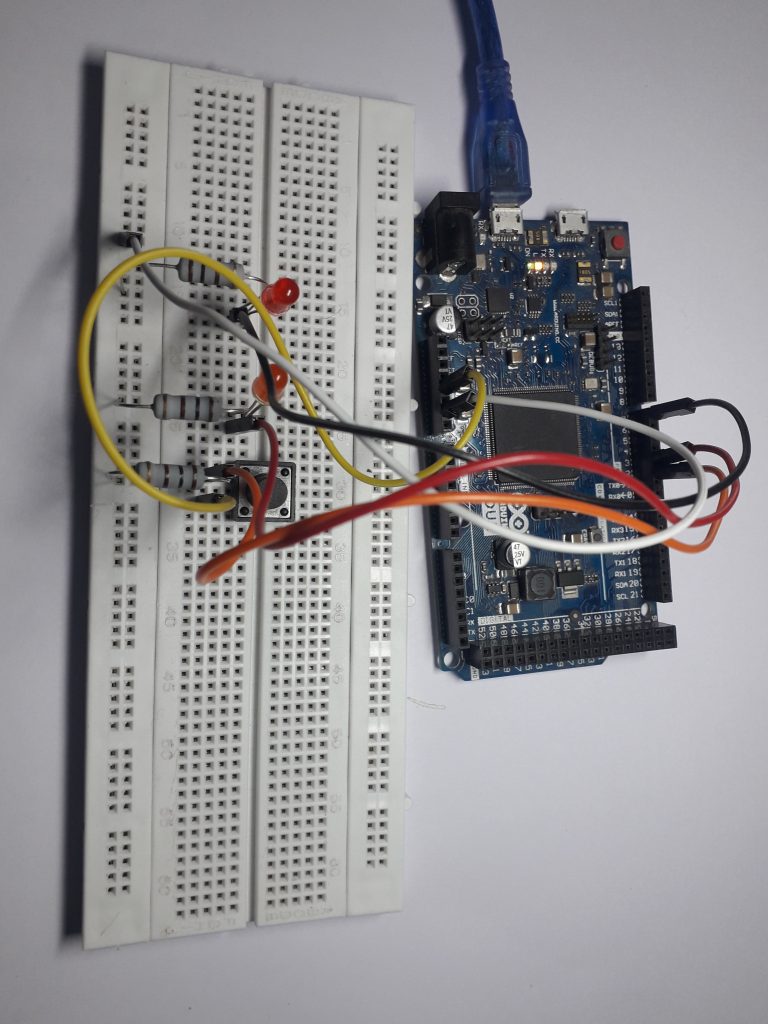
Let us suppose, you would like to do multitasking in Arduino such as mentioned in the below example the first task: is to blink an led while the second task is to ON and OFF a led by using a push button
As soon as you compile the below script you will notice the first task of blinking a led will work fine but when it comes to ON and OFF a led with push-button then at that instance, you will notice that the second task is not functioning with a single push on the push button
Why?
Because Arduino is built to execute a single task at a time and Arduino’s won’t have the muticore processor’s that we have in your p.c’s to execute multiple tasks at a time
// constants won't change. They're used here to set pin numbers:
const int buttonPin = 2;     // the number of the pushbutton pin
const int ledPin =  3;  // the number of the LED pin
const int ledPin1 =  7;

// variables will change:
int buttonState = 0;         // variable for reading the pushbutton status
void setup() {
  // initialize the LED pin as an output:
  pinMode(ledPin, OUTPUT);
   // initialize the LED1 pin as an output:
  pinMode(ledPin1, OUTPUT);
  // initialize the pushbutton pin as an input:
  pinMode(buttonPin, INPUT);
}
void loop()
//Task1: blink a led
{
digitalWrite(ledPin1, HIGH);   // turn the LED on (HIGH is the voltage level)
 delay(1000);                       // wait for a second
  digitalWrite(ledPin1, LOW);    // turn the LED off by making the voltage LOW
  delay(1000);
  //Task2: ON and OFF a led by a push button
  // read the state of the pushbutton value:
  buttonState = digitalRead(buttonPin);
  // check if the pushbutton is pressed. If it is, the buttonState is HIGH:
  if (buttonState == HIGH) {
    // turn LED on:
   digitalWrite(ledPin, HIGH);
  } else {
    // turn LED off:
    digitalWrite(ledPin, LOW);
 }
}
if you have compiled the above script then at that instant, you might have noticed that Arduino is stuck only in the first task of blinking a led
the problem with the delay() function is that it will halt the whole script and won’t allow the pointer to move to the second task it is better to use millis() instead of delay() to avoid the problem of delay
#define LED1 7
#define LED2 3
#define button 2
// set LED states
int LED1_state = LOW;
int brightness = 0;
// previous time for the tasks depending upon time.
unsigned long prevTime = millis();
// time intervals for the tasks
long interval = 1000; // blink every 1 second
void setup() {
pinMode(LED1, OUTPUT);
pinMode(LED2, OUTPUT);
pinMode(button, INPUT);
}
void loop() {
// put your main code here, to run repeatedly:
unsigned long currentTime = millis();
// Task 1 : Blink LED1
if (currentTime - prevTime > interval) {
LED1_state = !LED1_state;
digitalWrite(LED1, LED1_state);
prevTime = currentTime;
}
// Task 2 : Glow LED2 when BTN is pressed
if (digitalRead(button)) {
digitalWrite(LED2, HIGH);
} else {
digitalWrite(LED2, LOW);
}
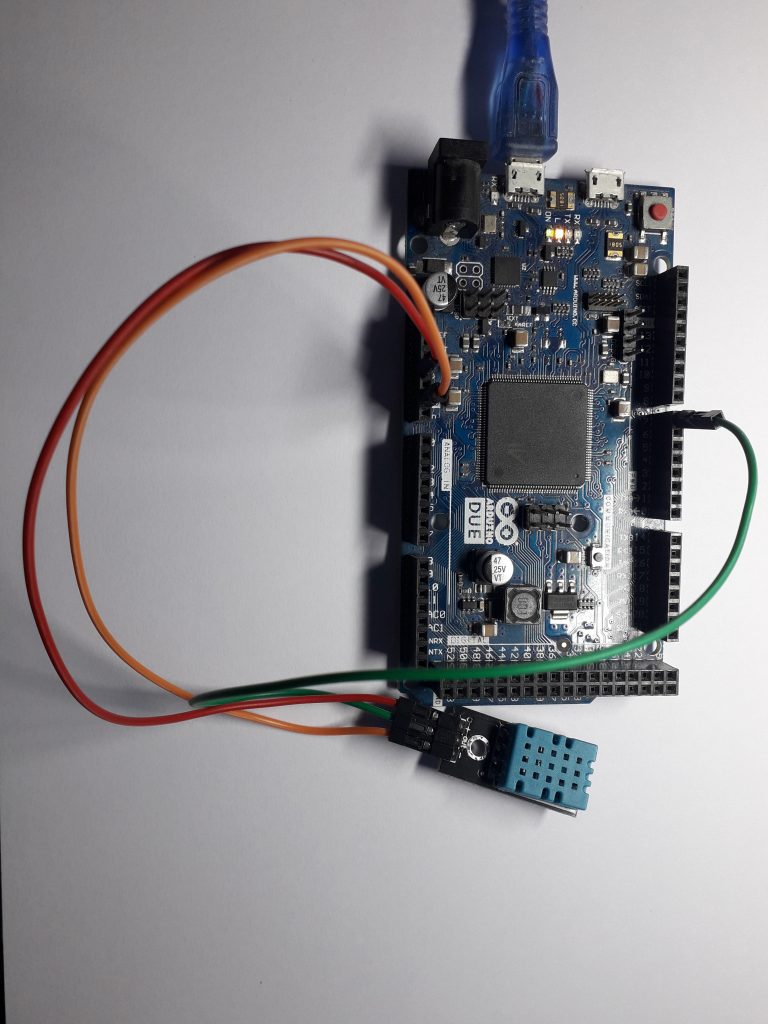
}How to use DHT11 Temperature and humidity sensor module with Arduino
To use the DHT11 module you need two libraries first: DHT Sensor Library and second: Adafruit Unified Sensor Lib
You can download the libraries in Arduino by going to sketch—>include library—> manage libraries but in our case, we need to download only one library called DHT sensor library and it will automatically download the dependent libraries to work with the DHT sensor
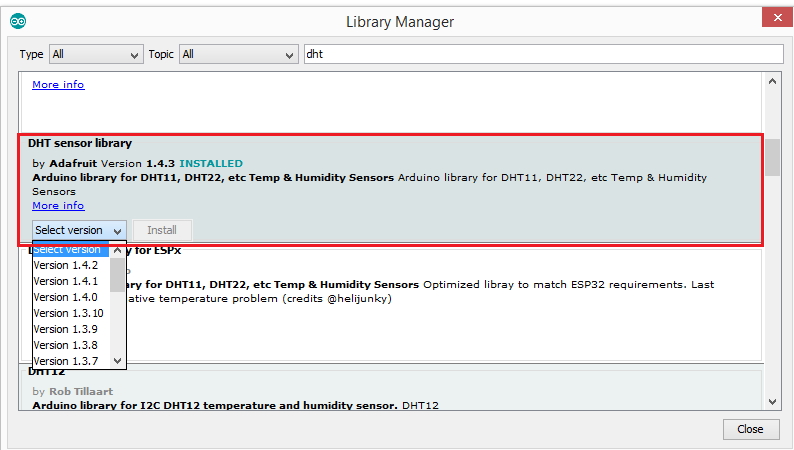
To test the install library and the DHT sensor module click on file —> Examples—> DHT Sensor library —> DHTtester
A new window will open up with DHTtester Sketch
#include "DHT.h"
#define DHTPIN 7 // Digital pin connected to the DHT sensor
// Feather HUZZAH ESP8266 note: use pins 3, 4, 5, 12, 13 or 14 --
// Pin 15 can work but DHT must be disconnected during program upload.
// Uncomment whatever type you're using!
#define DHTTYPE DHT11 // DHT 11
//#define DHTTYPE DHT22 // DHT 22 (AM2302), AM2321
//#define DHTTYPE DHT21 // DHT 21 (AM2301)
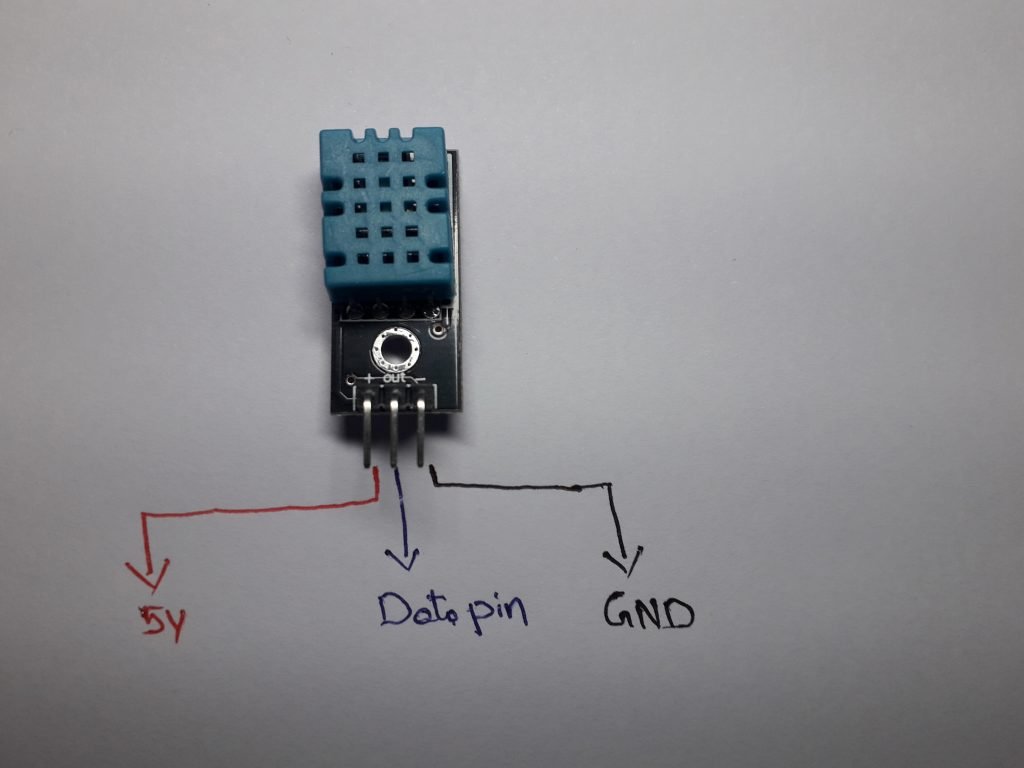
// Connect pin 1 (on the left) of the sensor to +5V
// NOTE: If using a board with 3.3V logic like an Arduino Due connect pin 1
// to 3.3V instead of 5V!
// Connect pin 2 of the sensor to whatever your DHTPIN is
// Connect pin 3 (on the right) of the sensor to GROUND (if your sensor has 3 pins)
// Connect pin 4 (on the right) of the sensor to GROUND and leave the pin 3 EMPTY (if your sensor has 4 pins)
// Connect a 10K resistor from pin 2 (data) to pin 1 (power) of the sensor
// Initialize DHT sensor.
// Note that older versions of this library took an optional third parameter to
// tweak the timings for faster processors. This parameter is no longer needed
// as the current DHT reading algorithm adjusts itself to work on faster procs.
DHT dht(DHTPIN, DHTTYPE);
void setup() {
Serial.begin(115200);
Serial.println(F("DHTxx test!"));
dht.begin();
}
void loop() {
// Wait two seconds between measurements.
delay(2000);
// Reading temperature or humidity takes about 250 milliseconds!
// Sensor readings may also be up to 2 seconds 'old' (its a very slow sensor)
float h = dht.readHumidity();
// Read temperature as Celsius (the default)
float t = dht.readTemperature();
// Read temperature as Fahrenheit (isFahrenheit = true)
float f = dht.readTemperature(true);
// Check if any reads failed and exit early (to try again).
if (isnan(h) || isnan(t) || isnan(f)) {
Serial.println(F("Failed to read from DHT sensor!"));
return;
}
// Compute heat index in Fahrenheit (the default)
float hif = dht.computeHeatIndex(f, h);
// Compute heat index in Celsius (isFahreheit = false)
float hic = dht.computeHeatIndex(t, h, false);
Serial.print(F("Humidity: "));
Serial.print(h);
Serial.print(F("% Temperature: "));
Serial.print(t);
Serial.print(F("°C "));
Serial.print(f);
Serial.print(F("°F Heat index: "));
Serial.print(hic);
Serial.print(F("°C "));
Serial.print(hif);
Serial.println(F("°F"));
}
Leave a Reply