

Before we start today blog, let me tell you that writing HTML code is different than normal languages such as python, and, C/C++
but Why?
Because, to use the python and C/C++, you won’t need a web browser to view the output of the program instead you can use any specific ide to display the output on the console but when it comes to HTML we use a web browser to display the output on the webpage
So, to see the output of the Html code we need a web server and also we need to configure our eclipse ide with a web server
in reality, The web server, that we will be using for this blog is Apache Tomcat
Step #1: download the eclipse ide Java EE IDE
before you install eclipse ide on your system make sure you have installed java on your system
why?
Because the eclipse is a purely java based ide and you need java on your system to operate eclipse on your system
who to determine whether java is installed or not on your system?
To check whether you have a java installed on your system you need to use a shortcut key as win + R from the keyboard and type cmd then press OK to open the window console
Once you see, a command prompt window popup on the screen, then, at that instance, type the below command to determine whether you have java on your system
Java --versionwith this in mind, Clear as mud?
on this occasion, Let’s jump in to download the eclipse ide
Click here —>to download the ide from the eclipse website
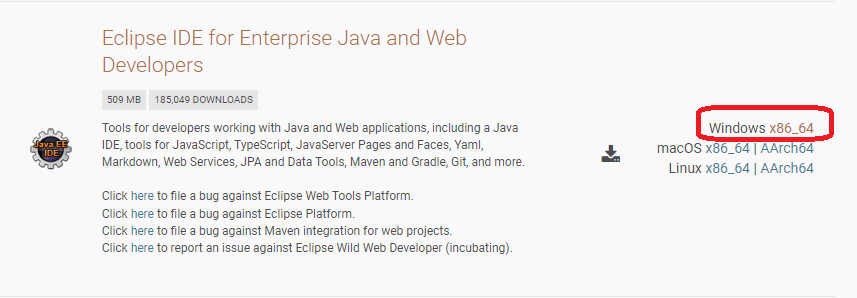
Once, you opened the eclipse website, then, at that instant, go to the download packages section and choose the Eclipse ide for Enterprise Java web Developers

Choose your operating system, in my case, I have a window 64bit operating system so, choose your operating system according to the system requirement and download it
In case, if you don’t know whether you have a 32bit or 64bit system type
Then in that case type, the command in the command prompt mentioned below to view your system type
systeminfoPretty effective, right?
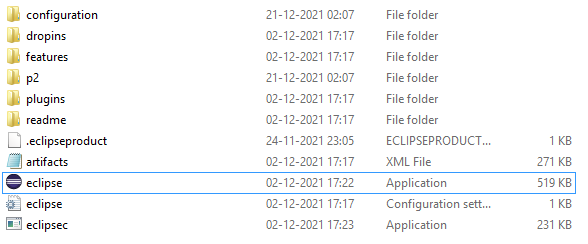
Once, you finished downloading the eclipse ide, then, at that instant, extract the files from the .zip file through a WinRAR software
when you finished the extraction of files, then, at that instance, go to the eclipse folder and launch the eclipse application
That’s it!
Step #2: download the Apache Tomcat webserver
Okay, here’s another one, that you need to download
Click here —>to download the Apache Tomcat webserver
this time, Choose the version which you would like to download and download it on your system
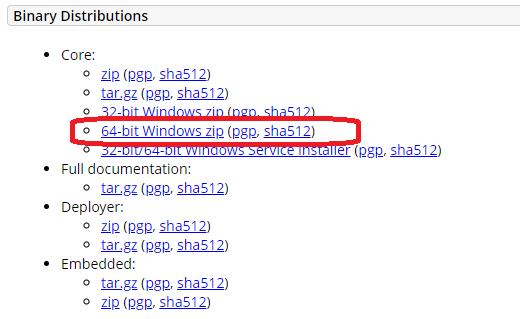
Once you finished downloading the file, extract the .zip file
Step #3: configure the eclipse ide with web server Apache Tomcat
in similar fashion, Let’s dive in to configure the eclipse ide
without a doubt, First, Launch your eclipse ide
on this occasion, go to the servers tab and click on (no servers are available click this link to create a new server )

In case, if you didn’t see the servers tab then at that instant
of course, click window —>show view —> and select servers option
not to mention, Next, select the Apache Tomcat version which you have downloaded and click next
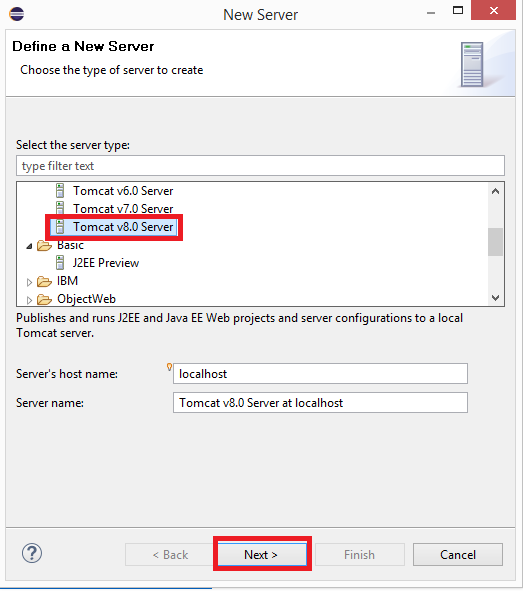
Browse to the path where you have saved the Tomcat server in my case, the path directory is (C:\Users\Mohammed Anees\Desktop\software\apache_tomcat\apache-tomcat-8.5.73 ) then click next
Finally, click Finish to complete the configuration to connect eclipse ide to web server Apache Tomcat
without a doubt, That’s it!
up to the present time, We configured, eclipse ide with the web server Apache Tomcat
Step #4: Test the configuration
in reality, let’s see whether we configured it right.
this time, By default, the server will be in stop mode
So, to test the configuration, that we have set,
to be sure, first, click on the server section, and on the server section, right-click on the” Tomcat v9.0 Server at localhost[stopped]” and click start
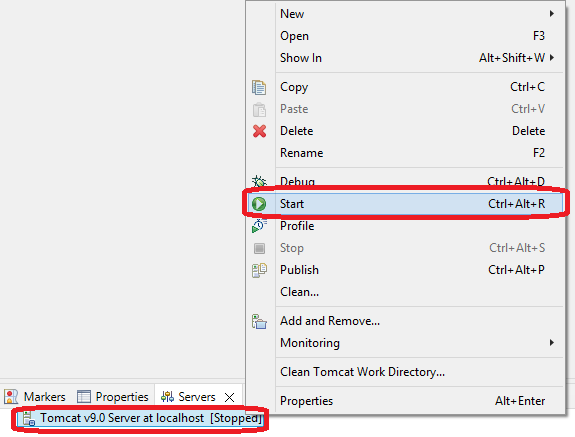
On your console tab, you will see something like this below when you click start

Once the server started, then on the server tab you will see
this time, “ Tomcat v9.0 Server at localhost[started,synchronized]”
If you double click on the “ Tomcat v9.0 Server at localhost[started, synchronized]” then at that instance, you will be able to see the port number of the webserver which is 8080
As we know that our server is started then let’s do a simple test to check the server on a web browser
until now, Okay,
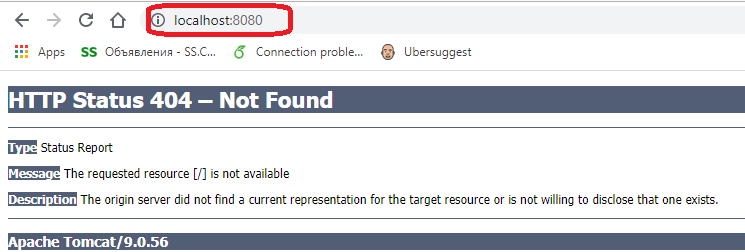
First, open your web browser and type the address as “localhost:8080” then you will get a result something like the below image
in reality, which means that you got a response from the Tomcat server
in short, whoa!
on the positive side, let me congrats you, that we have setup our eclipse ide with the tomcat server
until now, Okay,
in a word, Next, we will see, how we can create our first project right?
Step #5: Create a web project in eclipse
Once you configured the eclipse-ide with web server Apache Tomcat then we can create a new project
First, go to new—>Dynamic web project —> write the project name “Demo”—> next—> next —> finish
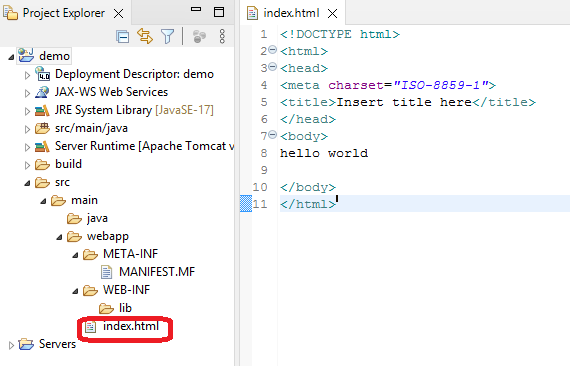
Second, right click on the demo project —>new —>HTML file—> write file name —> finish
Third, save the project(ctrl+s)
Fourth, run the project by going to run as —> 1 run on server —> click on localhost —>select Tomcat v9.0 Server at localhost —> next —> finish —> ok
Fifth: you will see the output on the web browser, if you don’t see any output on the web browser then at that instant, click on window —-> web browser and select the browser
not to mention Some basics about HTML
Structure of a HTML document
<!DOCTYPE html> <!-- tells browser its a HTML file -->
<html><!-- tag <html> indicates beginning of a web page> -->
<head>
</head>
<body>
</body>
</html><!-- tag </html> indicates end of a web page> -->
<head> tag is the place where you keep data that will not be visible to end-users but adds functionalities to the web page such as title, styles
<body> tag is the place where keep content of the page such as headings, buttons, text
Comment in HTML file
in a word, To comment in an HTML file use the below code
<!-- Comment in HTML file -->Body tag
that is to say, body tag applied all over Html document, usually, there has to be only one body tag that will be available in the whole Html document
The things that a body tag can do can also be done with the help of CSS and it is also, recommended to use CSS instead of a body tag
to begin with, Let’s see, How to use a body tag in an Html document
Here, in the below code bgcolor=”yellow” is an attribute<!DOCTYPE html>
<html>
<head>
<title>body tag</title>
</head>
<body bgcolor="yellow">
</body>
</html>Title
<!DOCTYPE html>
<html>
<head>
<title>aneescraftsmanship.com</title>
</head>
<body>
</body>
</html>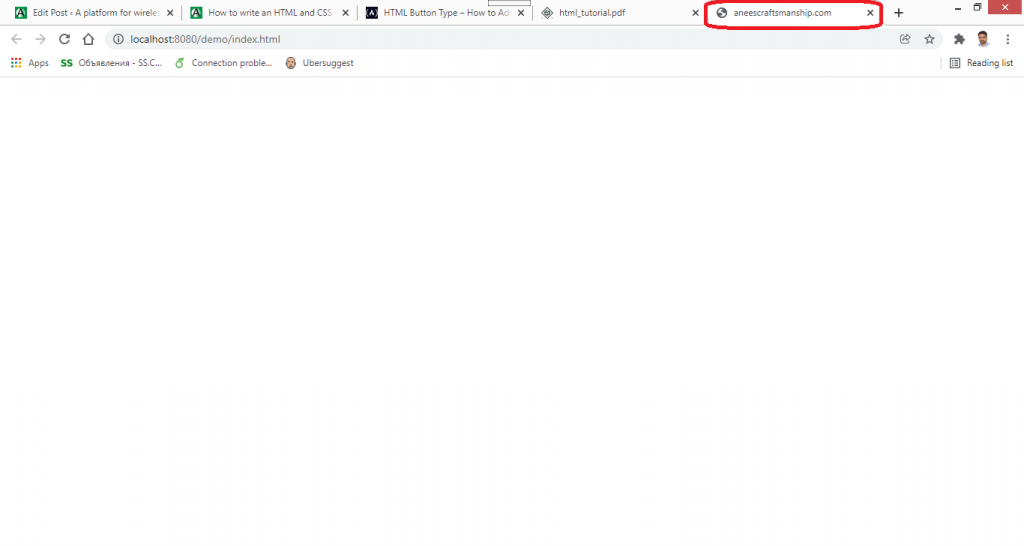
Headings tags
<!DOCTYPE html>
<html>
<head>
<title>aneescraftsmanship.com</title>
</head>
<h1> h1 aneescraftsmanship.com </h1>
<h2> h2 aneescraftsmanship.com </h2>
<h3> h3 aneescraftsmanship.com </h3>
<h4> h4 aneescraftsmanship.com </h4>
<h5> h5 aneescraftsmanship.com </h5>
<h6> h6 aneescraftsmanship.com </h6>
<body>
</body>
</html>

A Paragraph
<!DOCTYPE html>
<html>
<head>
<title>aneescraftsmanship.com [esp32 web server page]</title>
</head>
<body>
<h1> h1 aneescraftsmanship.com[esp32 web server page] </h1>
<p>pin 32 of an esp32 board - state</p>
<p>pin 26 of an esp32 board - state</p>
</body>
</html>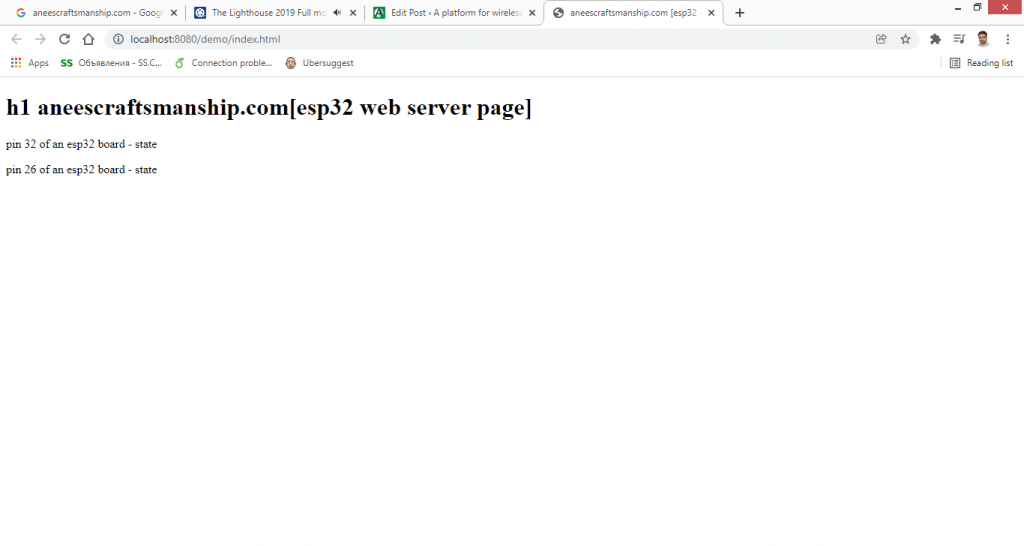
Sub tag and sup tag
on this occasion, let’s see how we can write subscript(sub tag) and superscript(sup tag) in Html and how we can use it, to generate subscript and superscripts to the letters
<!DOCTYPE html>
<html>
<body>
<h2 style="text-align:center;" >The sub and sup elements</h2>
<p style="text-align:center; ">water<span style="color:#DE3163;"> H<sub>2</sub> O</p></span>
<p style="text-align:center; ">Temperature in degrees<span style="color:#DE3163;"> 30 <sup>°C</sup></span> text.</p>
</body>
</html>The sub and sup elements
water H2 O
Temperature in degrees 30 °C text.
Create space in Html
To create space between two words use it will be inline and to break the line use <br>Striking a text
To strik a text in Html document you can use tags such as <del></del> or <s></s> and <strike></strike>Note: strike tag is removed from the HTML5
<!DOCTYPE html>
<html>
<body>
<h1>striking a text</h1>
<p><del>hi there! People, let's see, how we can strike a text?</del>
<ins>Successfully</ins>!</p>
<p><s>Second paragraph!</s></p>
<p><strike><p><strike>Third paragraph</strike> </p></strike>  </p>
</body>
</html>
striking a text
hi there! People, let’s see, how we can strike a text?
Successfully!
Second paragraph!
Third paragraph
Buttons
<!DOCTYPE html>
<html>
<head>
<title>aneescraftsmanship.com [esp32 web server page]</title>
</head>
<body>
<h1> h1 aneescraftsmanship.com[esp32 web server page] </h1>
<p>pin 32 of an esp32 board - state</p>
<p><button>ON</button></p>
<p><button>OFF</button></p>
<p>pin 26 of an esp32 board - state</p>
<p><button>ON</button></p>
<p><button>OFF</button></p>
</body>
</html>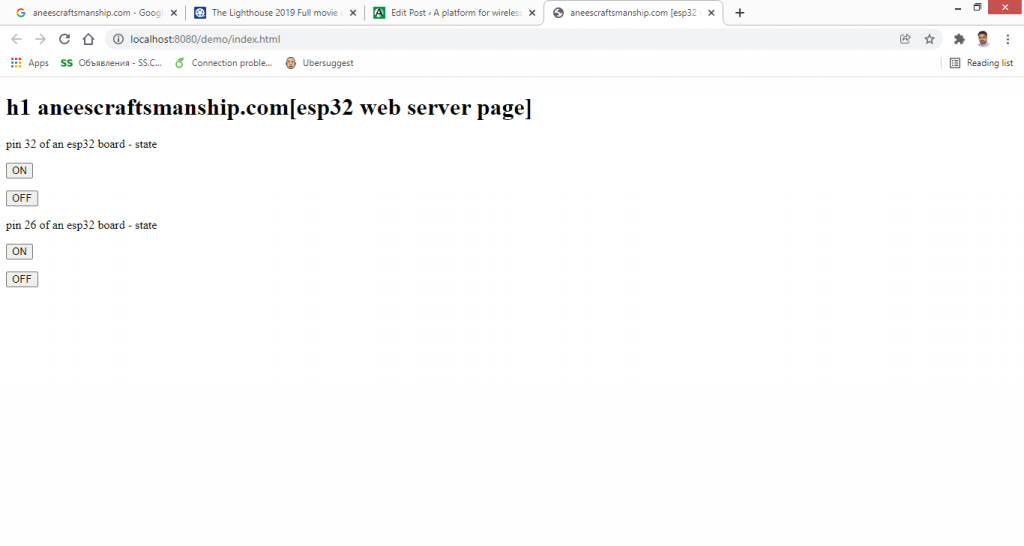
Hyperlinks
Hyperlinks are nothings but Html links that you can create to link a text, image, button, or any other element to a certain destination
Syntax
<a href="url"> link text</a>Example
<p>Example Text :To use the below code, you need to copy and paste code in your Arduino ide and install a library called <a href="https://github.com/me-no-dev/ESPAsyncWebServer/"><span style="color:#DE3163;">ESPAsyncWebServer</span></a></p>
<p>Use " target="_blank" to open the link in a new tab window </p>
<p>Example Text :To use the below code, you need to copy and paste code in your Arduino ide and install a library called <a href="https://github.com/me-no-dev/ESPAsyncWebServer/"target="_blank"><span style="color:#347C17">ESPAsyncWebServer</span></a></p>Example Text :To use the below code, you need to copy and paste code in your Arduino ide and install a library called ESPAsyncWebServer
Use ” target=”_blank” to open the link in a new tab window
Example Text :To use the below code, you need to copy and paste code in your Arduino ide and install a library called ESPAsyncWebServer
Linking a text and button
<!DOCTYPE html>
<html>
<head>
<title>aneescraftsmanship.com [esp32 web server page]</title>
</head>
<body>
<h1> h1 aneescraftsmanship.com[esp32 web server page] </h1>
<p>pin 32 of an esp32 board - state</p>
<p><button>ON</button></p>
<p><button>OFF</button></p>
<p>pin 26 of an esp32 board - state</p>
<p><button>ON</button></p>
<p><button>OFF</button></p>
<p><a href="http://aneescraftsmanship.com/"> link text</a></p>
<p><a href="http://aneescraftsmanship.com/"> <button>button link</button></a></p>
</body>
</html>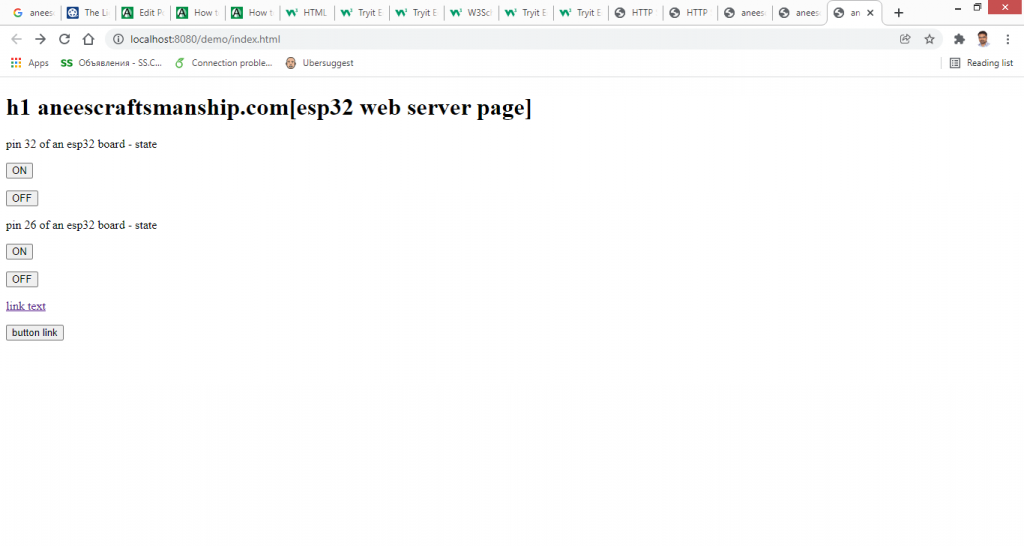
CSS (cascading style sheets)
in brief, CSS is used to style the HTML document and it consists of 3 major attributes
- Selectors:[a selector is an HTML tag at which you can apply a style such as <h1> or <p1> etc]
- Property: [for example, colour is a property which denotes the colour of the text ]
- Property value:[ for example, the colour property has property value #ff0000 for red and #00ff00 for green]
Syntax
Selector{ property: property value;}A example
a:hover{background-color: yellow;}How to link a CSS style sheet to an HTML document
in general, There are three ways by which you can link a CSS style sheet to an HTML document
- External
- Internal
- Inline
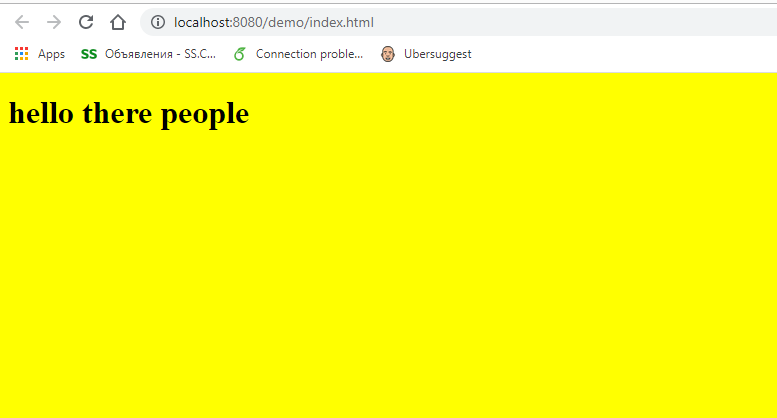
External
index.html
<!DOCTYPE html>
<html>
<head>
<link rel ="stylesheet" href="style.css">
<title> esp32 server </title>
</head>
<body>
<h1>hello there people</h1>
</body>
</html>
this time, You can create an external file in eclipse by right-clicking the project folder in my case Demo folder —>new —>CSS.FILE—>write file with .css extention —>finish
Style.css
body {
  background: yellow;
}
Internal
<!DOCTYPE html>
<html>
<head>
<style>
body {
  background-color: yellow;
}
h1 {
  color: red;
  margin-left: 20px;
}
</style>
</head>
<body>
<h1>hi! there people</h1>
<p>This is a paragraph.</p>
</body>
</html>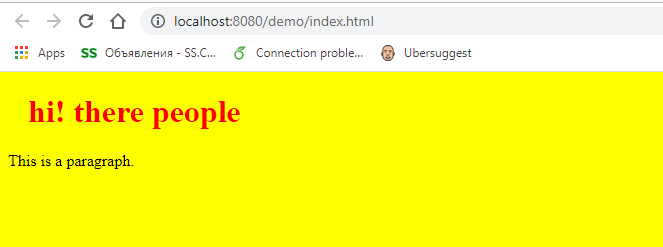
Inline
Inline style defines within a specific element so, that it will not interfere with the other remainging elements on the web page
<!DOCTYPE html>
<html>
<head>
</head>
<body>
<h1 style="color:blue;text-align:center;">This is a heading</h1>
<p style="color:red;">This is a paragraph.</p>
</body>
</html>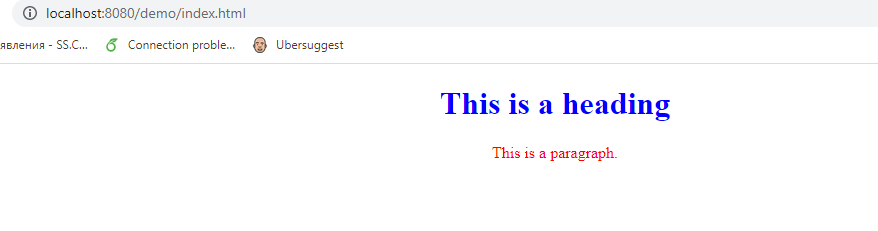
Style tag
To write a CSS you need to use style tag <style></style> but is recommended to place in the <head></head> tags of your html document
<!DOCTYPE html>
<html>
<head>
<style>
div.s1 {color:#800000;background-color:yellow;}
div.s2{color:#00FF00;border:1px solid red;}
</style>
</head>
<body>
<div class="s1"><h1>This is a heading</h1></div>
<div class="s2"><p>This is a paragraph.</p></div>
</body>
</html>
This is a heading
This is a paragraph.
How to use Classes and ids
not to mention, by using classes you can change tags with different styles and use the below code by creating an external .css file called style.css
NOTE: to begin with, always use dot(.) prefix for class
For example(.blue, .yellow, .pink)
index.html
<!DOCTYPE html>
<html>
<head>
<link rel ="stylesheet" href="style.css">
</head>
<body>
<h1 class="blue">This is a heading</h1>
<p class="yellow">This is a paragraph.</p>
<p class="pink">This is a paragraph.</p>
</body>
</html>
style.css
.blue{color:blue;}
.yellow{color: yellow;}
.pink{color:pink;}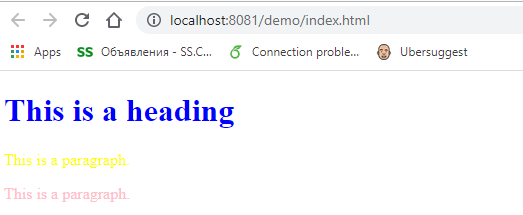
ids
For ids replace the word class with ids and also replace the prefix dot(.) with a hash(#)
You can use classes and ids but the best practice is that ids have to be unique on a page
but Why?
Because it will be helpful for you when you write a java script
index.html
<!DOCTYPE html>
<html>
<head>
<link rel ="stylesheet" href="style.css">
</head>
<body>
<h1 id="blue">This is a heading</h1>
<p id="yellow">This is a paragraph.</p>
<p id="pink">This is a paragraph.</p>
</body>
</html>
style.css
#blue{color:blue;}
#yellow{color: yellow;}
#pink{color:pink;}
Meta tag in HTML
in short, The meta tag provides information related to the HTML page and the content of the meta tag will not be visible to the end-user or web page
Meta tags, metadata is used by browsers and search engines to get information related to a webpage such as description, keywords, author, character set
in general, the Meta tags are always used in <head> element
not to mention,The meta tag viewport will scale the web page to a mobile device or any other device
Example
<!DOCTYPE html>
<html>
<head>
<meta name="viewport" content="width=device-width, initial-scale=1.0">
</head>
<body>
</body>
</html>
Span tag
in brief, The span tag is a line tag and it is used to format a text
<!DOCTYPE html>
<html>
<head>
</head>
<body>
<h1> span tag </h1>
<p> hi there! People<span> I have just created a paragraph </span>to explain the concept of span tag and let me create a second line of the paragraph so that I can extend the paragraph </p>
</body>
</html>
span tag
hi there! People I have just created a paragraph to explain the concept of span tag and let me create a second line of the paragraph so that I can extend the paragraph
When we use span tag it will not have any effect on the text
but Why?
Because to format, a text span won’t have any local attributes we can only use global attributes(such as class, ids, style) in the span tag that we usually use in other tags
<!DOCTYPE html>
<html>
<head>
</head>
<body>
<h1> span tag </h1>
<p> hi there! People<span style="background-color:yellow;"> I have just created a paragraph </span>to explain the concept of span tag and let me create a second line of the paragraph so that I can extend the paragraph </p>
<p> hi there! People<span style="background-color:cyan; border:1px solid red;"> I have just created a paragraph </span>to explain the concept of span tag and let me create a second line of the paragraph so that I can extend the paragraph </p>
</body>
</html>
span tag
hi there! People I have just created a paragraph to explain the concept of span tag and let me create a second line of the paragraph so that I can extend the paragraph
hi there! People I have just created a paragraph to explain the concept of span tag and let me create a second line of the paragraph so that I can extend the paragraph
Div tag
in sum, The div tag divides the whole Html document into different sections and the div element is often used as a container(similar to a box) for other Html elements
When we use a div tag it will not have any effect on the div section
but Why?
Because to format, a section div won’t have any local attributes we can only use global attributes(such as class, ids, style) in the div tag that we usually use in other tags
<!DOCTYPE html>
<html>
<head>
</head>
<body>
<h1> div tag </h1>
<div><p> hi there! People<span style="background-color:yellow;"> I have just created a paragraph </span>to explain the concept of span tag and let me create a second line of the paragraph so that I can extend the paragraph </p></div>
<div><p> hi there! People<span style="background-color:cyan; border:1px solid red;"> I have just created a paragraph </span>to explain the concept of span tag and let me create a second line of the paragraph so that I can extend the paragraph </p></div>
</body>
</html>
div tag
hi there! People I have just created a paragraph to explain the concept of span tag and let me create a second line of the paragraph so that I can extend the paragraph
hi there! People I have just created a paragraph to explain the concept of span tag and let me create a second line of the paragraph so that I can extend the paragraph
to sum up, We can change the properties of div by using CSS
<!DOCTYPE html>
<html>
<head>
</head>
<body>
<h1> div tag </h1>
<div style="background-color:white; border:1px solid red;"><p> hi there! People<span style="background-color:yellow;"> I have just created a paragraph </span>to explain the concept of span tag and <span style="color:#DE3163;">let me create a second line of the paragraph </span>so that I can extend the paragraph </p></div>
<br><!---space-->
<div style="background-color:yellow; border:1px solid red;"><p> hi there! People<span style="background-color:cyan; border:1px solid red;"> I have just created a paragraph </span>to explain the concept of span tag and let me create a second line of the paragraph so that I can extend the paragraph </p></div>
</body>
</html>
div tag
hi there! People I have just created a paragraph to explain the concept of span tag and let me create a second line of the paragraph so that I can extend the paragraph
hi there! People I have just created a paragraph to explain the concept of span tag and let me create a second line of the paragraph so that I can extend the paragraph
Difference between div tag and span tag
Both div tag and span tag are similar to each but div tag is used for a section of elements while the span is used for inline
In the below code, the span tag is interchanged with the div tag so that you can see the difference
in case, If you have noticed!
That when I applied div into the line of a text, it immediately move to next line similarly, in case of span tags it works smoothly within the single line of text
<html>
<head>
 </head>
<body>
    <h1> Difference between div tag and span tag</h1>
<p> hi there! People<span style="background-color:yellow;"> I have just created a paragraph </span>to explain the concept of<span style="background-color:cyan; border:1px solid red;"> span tag and let me</span> create a second line of the paragraph so that I can extend the paragraph </p>
<p> hi there! People<div style="background-color:yellow;"> I have just created a paragraph </div>to explain the concept of<div style="background-color:cyan; border:1px solid red;"> span tag and let me</div> create a second line of the paragraph so that I can extend the paragraph </p>
</body>
</html>
Difference between div tag and span tag
hi there! People I have just created a paragraph to explain the concept of span tag and let me create a second line of the paragraph so that I can extend the paragraph
hi there! People
Some div tag examples
<!DOCTYPE html>
<html>
<head>
<style>
div.A1 {width:200px;background:#00FFFF;border:1px dotted black;text-align:center}
</style>
</head>
<body>
<div class="A1"><p>content</p></div>

</body>
</html>
content
#example 2
<!DOCTYPE html>
<html>
<head>
<style>
div.B1 {width:200px;background:#00FFFF;border:1px dotted black;text-alig:center;padding:8px;}
div.B1 ul {color:green;}

</style>
</head>
<body>
<div class="B1"><p>table of content</p>
<ul>
<li>Item 1</li>
<li>Item 2</li>
<li>Item 3</li>
</ul>
</div>
</body>
</html>
table of content
- Item 1
- Item 2
- Item 3
Position a text
<!DOCTYPE html>
<html>
<head>
<style>
div.absolute {
  position: absolute;
  top: 400px;
  right: 0;
  width: 200px;
  height: 10px;

}
</style>
</head>
<body>
  <div class="absolute">aneescraftsmanship.com</div>
</div>
</body>
</html>
Leave a Reply