

Step #1: open your arduino-ide
Step #2: click file —-> preferences
step #3: go to GitHub and copy the link from the Arduino core for ESP32
Copy the code of index.json from Arduino core for ESP32 and paste it into the additional boards managed url’s —–>ok
https://raw.githubusercontent.com/espressif/arduino-esp32/gh-pages/package_esp32_dev_index.jsonIn case, if you’re already having an ESP8266 board url then at that instant, you need to separate the ESP32 board URL with the ESP8266 url by using a comma(,) as mentioned below
ESP8266 url,ESP32 url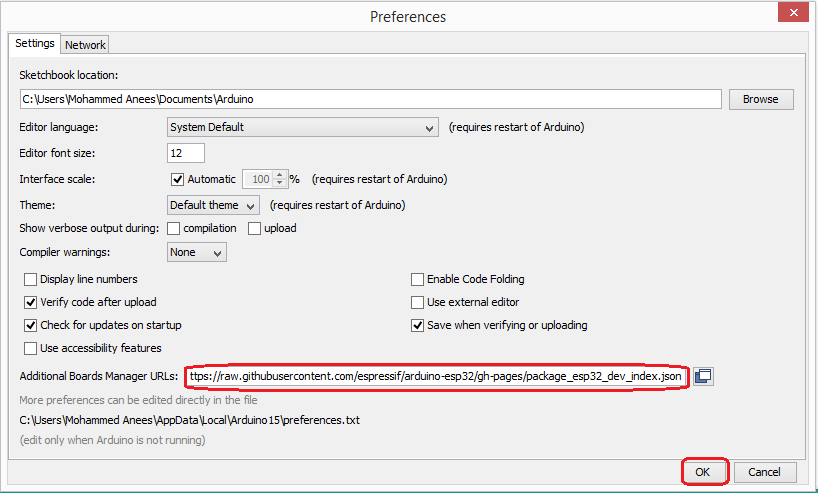
Step #4: plug in the ESP32 board in your pc, then, at that instant you will notice, a red led will light up on the ESP32 board
Step #5: from Arduino ide open Tools—> Board —–> Boards manager then type ESP32 to find esp32 by Espressif systems and click install
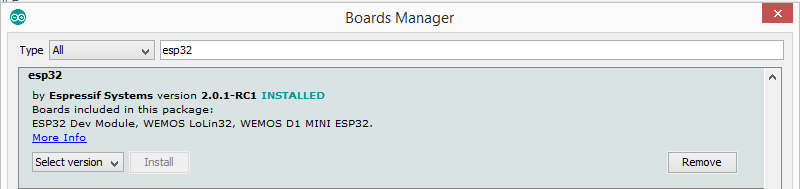
Step #6: select the board by Tools —> board —-> and select the board
In my case, my esp32 board work fine with the boards such as(ESP32 Dev module, ESP32 Wrover module, DOIT ESP32 DEVKIT V1)
Step #7: Select the port by Tools —->Port—->Select your port such as COM5, COM4, COM3
Step #8: test your build configuration by using build-in configuration examples such as
First example, click file —> Examples —> Basic’s—> Blink —> then click upload
If you are using ESP32 for the first then might get an error something like the below link
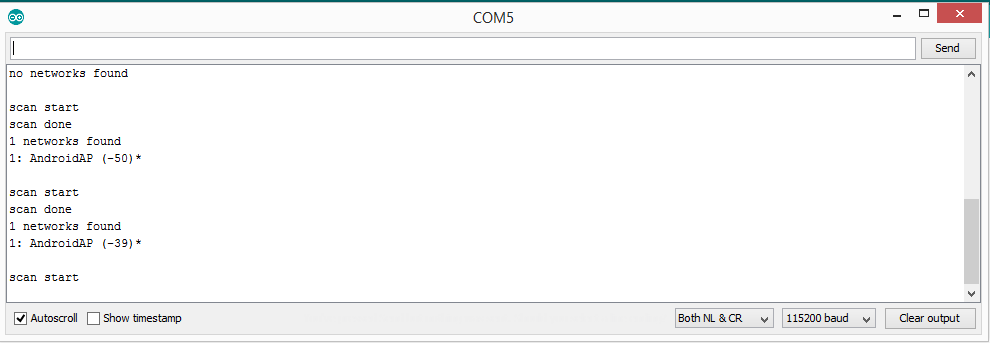
The second example, click file —>Examples —>Wifi—>Wifi scan—> upload—>after it upload the code click serial monitor
It will scan the wifi’s devices around the board, and, display it, on the serial monitor, so, to view the wifi device, you can open your mobile hotspot
Leave a Reply